You want to make beautiful candles, but you worry about the glass cracking or breaking. A broken jar is a fire hazard and a total waste of time and materials. I will share the exact jar types I trust to keep your candle-making safe and successful.
The best jars for making homemade candles are containers specifically designed for high heat, such as tempered or borosilicate glass. Mason jars and jelly jars can work if they are heat-treated, but you must always choose thick-walled, straight-sided jars to minimize thermal stress and ensure safety while burning.
I remember when I first got into glass, I thought any jar would do. It turns out, that mistake can cost you big time, not just in lost product, but in terms of safety. You must understand that a candle jar is not just a container; it is part of the safety system for the whole product. Let us dive into what makes a jar truly safe and effective for your wonderful candle creations.
What are the best jars for candle making?
You see so many jar options and feel lost about which ones are truly safe for candle wax. Choosing the wrong jar means risking a messy, potentially dangerous candle fire. I will explain the proven glass types that professional candlemakers rely on.
The best jars for candle making are made from heat-resistant glass like borosilicate or tempered soda-lime glass, or metal tins. These materials can handle the high temperatures of melted wax and the thermal shock from the flame. I always recommend avoiding thin glass, recycled glass, or containers with narrow necks, as these often fail under candle heat.
I have spent years in the glass bottle industry, and I know that not all glass is equal. The right jar selection is critical, especially when you are creating a product that involves fire. I always tell my clients, safety comes first, then profit. We need to look closely at material, shape, and wall thickness.
Glass Material Comparison for Candles
Different glass types react differently to heat. Borosilicate glass, for example, is highly resistant to thermal shock. It is the same material used for laboratory beakers, which must handle constant temperature changes. Tempered soda-lime glass is also good because it is processed to be much stronger than regular glass. Here is a simple breakdown of the most common materials:
| Jar Material | Heat Resistance | Pros | Cons |
|---|---|---|---|
| Borosilicate Glass | Very High | Excellent thermal shock resistance, very safe. | Expensive, harder to find in some shapes. |
| Tempered Soda-Lime Glass | High | Durable, widely available, cost-effective. | Can still break if scratched or subjected to extreme shock. |
| Metal Tins | Very High | Excellent heat conduction, lightweight, non-breaking. | Can get very hot to the touch, opaque (cannot see the wax). |
| Standard Soda-Lime Glass | Low | Cheapest, easiest to find. | High risk of cracking or shattering with prolonged heat. |
You should always aim for jars with straight sides and a wide mouth. This design allows heat to escape evenly and reduces the stress on the glass walls. Jars that curve inward or have odd shapes create stress points where heat concentrates. This can cause the glass to crack, especially when the flame reaches the bottom. Also, the wall thickness is a major factor. A thicker wall provides a stronger barrier against the heat and offers better insulation. Do not compromise on quality here; a few cents saved on a cheap jar are not worth the risk. My experience has shown me that customers are willing to pay a little more for a product that they know is safe and well-made.
How to know if glass is heat-resistant for candles?
You have a beautiful jar but you are unsure if it will hold up to the heat of a burning candle. Using an untested jar could lead to an unfortunate and dangerous explosion. I will explain the simple checks and signs to look for when selecting a candle-safe container.
You can tell if glass is heat-resistant by checking for specific labels like “tempered,” “oven-safe,” or “borosilicate.” If there is no label, look for thick, uniform walls and a straight-sided shape. I personally test new jars with a trial burn, or I insist on getting a heat resistance certificate from the manufacturer before I commit to a large order.

When I worked at the glass factory, I learned that heat resistance is not a guess; it is a measurable property of the glass formulation and the production process. You need to be a smart buyer and ask the right questions to your supplier. Do not just take their word for it. You must demand proof.
Certifications and Checks for Safe Glass
When I source glass for my juice business, I always look for ISO and FDA certifications. For candle jars, you should look for proof of heat treatment. The manufacturing process makes all the difference. Tempered glass is heated to over $600^\circ\text{C}$ and then rapidly cooled. This process makes the outer layer much stronger.
Key Checks to Perform:
- Ask for the Glass Composition Sheet: A reliable supplier should provide the exact chemical makeup. Borosilicate will contain high levels of boron trioxide. This is a clear indicator of high thermal resistance. Standard soda-lime glass lacks this.
- Visual Inspection for Uniformity: Hold the jar up to the light. Look for uneven spots, bubbles, or thin areas in the glass. Thinner spots are major stress points where cracking is likely to start. The glass thickness should be consistent from top to bottom.
- The Boiling Water Test (Trial Run): You can do a simple, low-risk test at home. Carefully fill the empty jar with boiling water and let it sit. If the jar cracks or shatters, it is definitely not safe for candles. If it survives, it is a good sign, but it is not a 100% guarantee of safety under a sustained flame. You must still do a controlled burn test.
- Look for Safety Rims: A good candle jar often has a slight rim at the top. This small feature helps contain any melted wax and provides a stronger lip, which adds structural integrity to the whole container. Always check that the bottom is thick and flat to prevent heat concentration. A flat bottom disperses heat better than a concave or rounded base.
I always recommend that buyers, even small businesses, demand third-party lab reports on thermal shock resistance. My own pain point with suppliers has always been delayed delivery and varying quality. You must lock in your quality standards early and use clear specifications to avoid costly surprises later. This technical detail is what separates a professional product from a risky DIY project.
What is the 84 rule in candle making?
You are looking for a simple, reliable way to choose the perfect wick for your jar size. A poorly wicked candle will tunnel, create huge flames, or even overheat the glass. I will break down the essential “84 Rule” which is a great starting point for selecting the right wick.
The “84 Rule” is a general guideline for choosing the correct wick size in candle making, suggesting that the melt pool diameter should reach the edge of the container within 4 hours of burning. This helps ensure an even burn, prevents tunneling, and limits the heat buildup near the jar’s bottom. I use this rule as a benchmark and then fine-tune the wick from there based on the specific wax and fragrance.
The “84 Rule” is not some magic formula, but it is a solid piece of advice that you should take seriously. When you start your business, you need clear steps to follow. This rule helps you manage two critical factors: melt pool and temperature. When I help a client with their packaging, I always look at how the final product will perform, not just how it looks.
Mastering Wick Selection and Container Safety
The wick is the engine of your candle. If the wick is too small, the candle will tunnel, leaving wax on the sides. This wastes product. If the wick is too large, the flame will be too big, and the jar will overheat. This is a huge safety issue. The 84 rule tries to balance these two problems.
Applying the 84 Rule:
- Measure the Diameter: Measure the inner diameter of your candle jar in inches. Let us call this $D$.
- The Burn Test: Light the candle and let it burn for 4 hours (the “4” in 84).
- The Check: After 4 hours, the melted wax (the melt pool) should extend to within 1/8 inch (0.125 inches) of the edge of the container (the “8” in 84).
- Adjust and Repeat:
- Melt Pool is too small: The wick is too small. Try the next size up.
- Melt Pool is too large (or hits the edge too fast): The wick is too big. Try the next size down.
You must remember that wax type, fragrance oil, and dye all impact the performance of the wick. A fragrance with a heavy oil content will slow down the burn, meaning you might need a slightly larger wick. The 84 rule is just your starting point. You need to keep testing until you find the perfect match for your specific candle recipe. I always tell buyers that product testing is the step that you cannot skip. It protects your brand and your customers. Getting it right ensures that the jar never gets too hot. A well-wicked candle controls the heat and keeps the glass safe.
What jars can you use to make candles?
You need a list of approved, safe, and easily sourced containers for your candle line. You do not want to waste time trying out containers that are known to fail or look unprofessional. I will give you a list of trusted jar types that I have seen succeed in the marketplace.
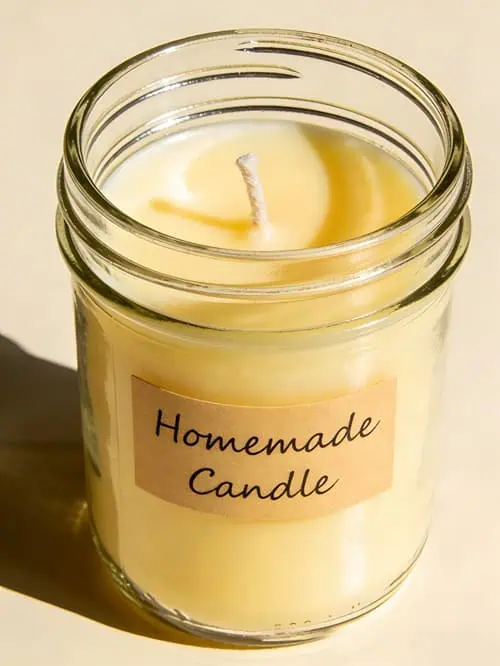
You can safely use purpose-made candle jars, straight-sided mason jars, glass food storage containers, and seamless metal tins for candle making. The key is that they must be clean, dry, have thick walls, and have no air bubbles or cracks. I always tell people to focus on simple, classic shapes, as they are inherently safer and look more professional in the market.
My experience in supplying glass packaging has taught me that the best jars are often the most basic. Simple designs are cheaper to produce and more consistent in quality. Complicated shapes introduce structural weaknesses. You need to keep it simple to keep it safe and profitable. I always push for clean, straight designs when I talk with my factory contacts.
My Go-To Safe Candle Containers
When I help clients source containers, I focus on four main types that have a proven track record for both safety and market appeal. These containers are widely available, which is key for reliable supply.
| Container Type | Best For | Safety Notes | Market Appeal |
|---|---|---|---|
| Apothecary Jars | Premium/Luxury Lines | Often tempered, very thick glass, designed for stability. | High-end, classic, strong visual presence. |
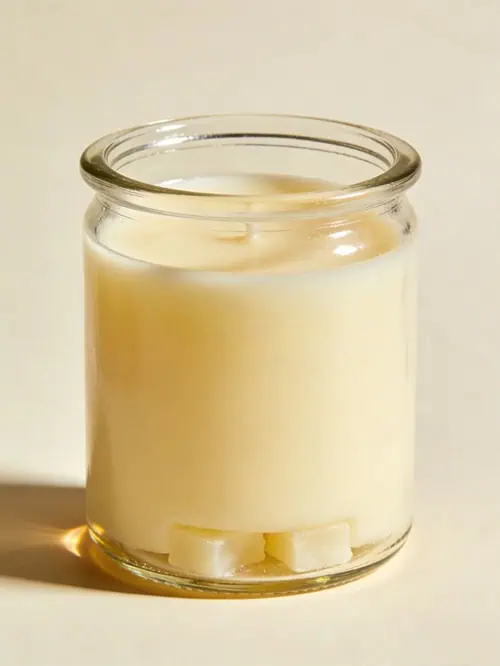
| Straight-Sided Jars | General Purpose/Scented | Even heat distribution, minimal stress points, easy to wick. | Clean, modern, very versatile for labels. |
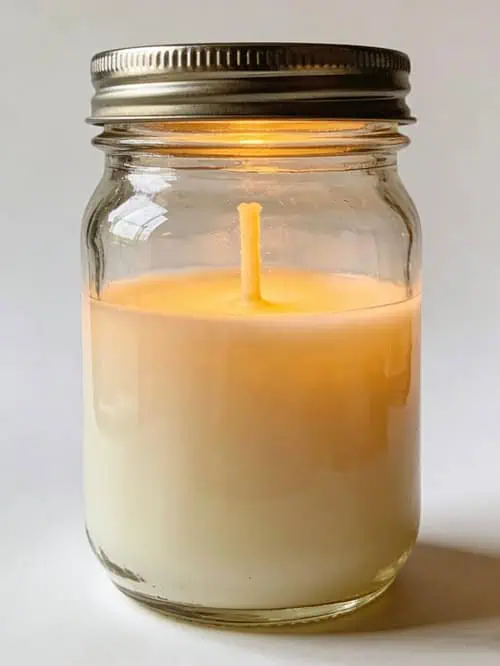
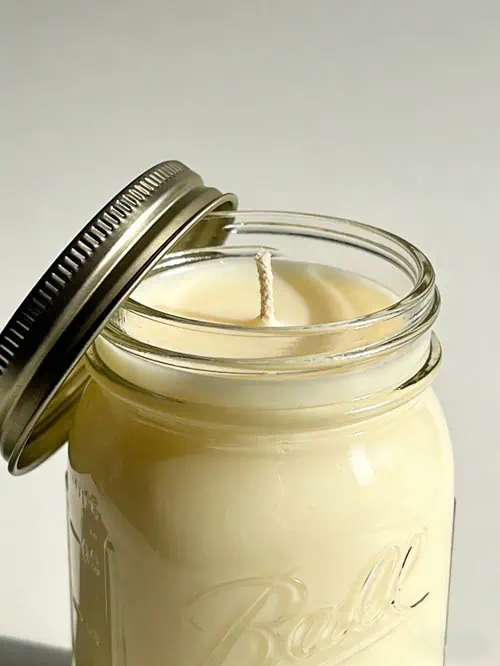
| Mason Jars (Canning Jars) | Rustic/Farmhouse Style | Designed for heat and pressure (canning), very durable. | Homely, popular, cost-effective, but check heat rating. |
| Metal Tins (Seamless) | Travel/Outdoor/Gift Sets | Unbreakable, lightweight, excellent heat tolerance. | Practical, modern, great for small, portable candles. |
I always advise buyers like Jules to consider logistics. The heavier and thicker the glass, the more it costs to ship. You need to balance safety with shipping costs. A straight-sided jar is often easier and safer to pack than a jar with a complicated shoulder or lid fitting. I found that my most successful clients are the ones who prioritize consistency. They choose a container and stick with it. This lets them perfect their wick and wax formula, which is the real secret to a high-quality, safe candle. When you are sourcing from a developing country, like China or Vietnam, you must be extremely clear on the glass type and demand samples from every batch to check for variations. Never assume the quality will stay the same.
Conclusion
The best candle jars are thick, straight-sided, and made from heat-resistant glass like tempered or borosilicate. You must use the 84 Rule for wicking and always test your final product for safety.